Lumpia is the Filipino deep-fried spring roll that catches the spotlight at every party. A food processor is great for this recipe. If you don’t have a food processor, that’s fine! Just make sure you finely mince all the ingredients for a better lumpia filling.
The recipe and tips below come from experience both handed down from my grandma as well as the sheer number of times I’ve cooked this for friends and collaborations. Lumpia is pretty easy to make and difficult to really screw up.
Tips
- Don’t over process the filling. It can turn into a paste which I think doesn’t have a great texture
- Especially if you’re starting out, I recommend frying a tiny bit of the filling in a pan on the stove right after you mix in the spices and fish sauce to taste the flavor. You can then adjust to your taste.
- I prefer to wrap each lumpia individually and close the sides but you can use whatever method you want. The fastest is using a full large sheet, rolling the filling along the whole edge and cutting with scissors. However, you will have filling exit the lumpia and end up in the oil when frying.
- After wrapping, I put the lumpia in the freezer for at least 10 minutes before frying. I do this because it minimizes unraveling during frying.
Process
In general, the process for making lumpia is straightforward. Turn all the ingredients into mush then wrap and fry! However there are a few things I want to point out.
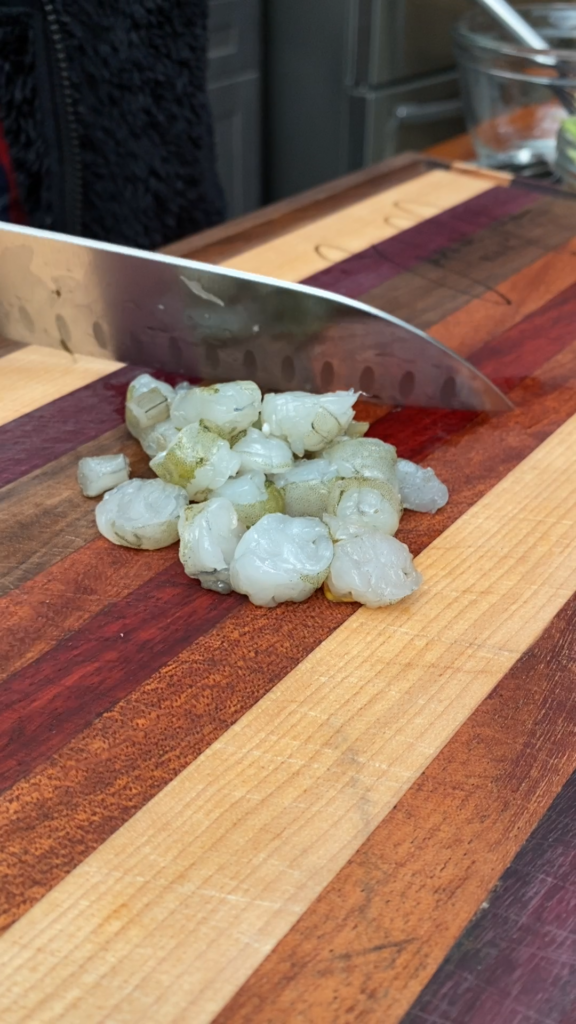
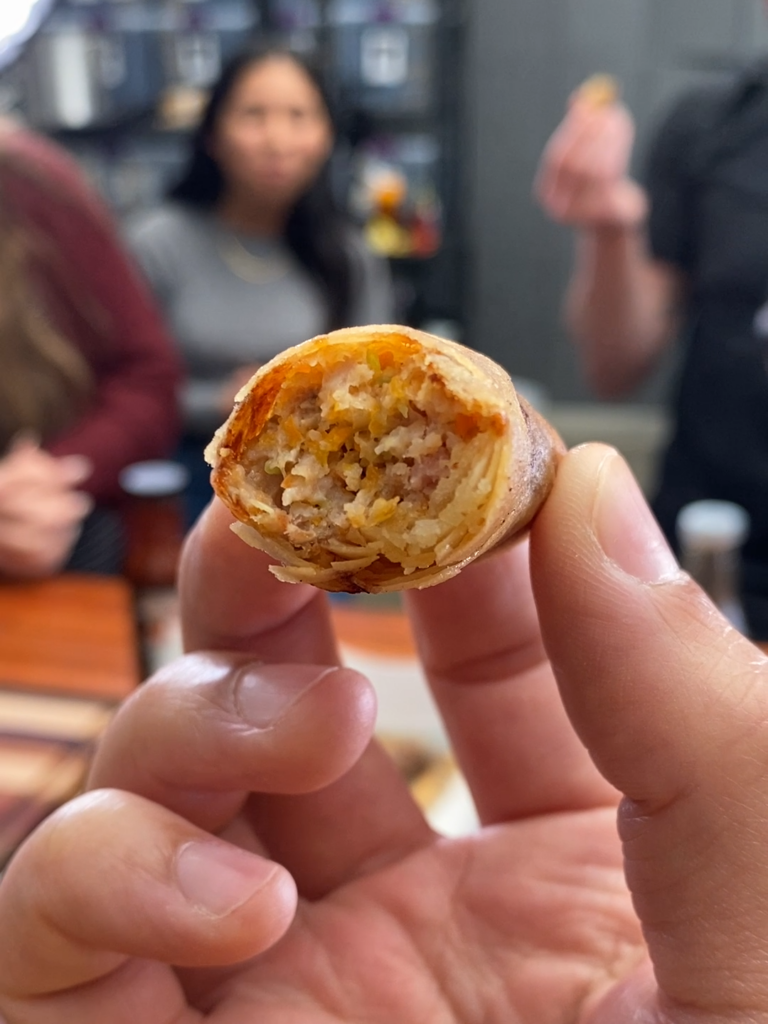
Be careful not to over work the ingredients in the food processor. Whether you’re using a food process or a knife, shrimp can easily turn into a gelatinous paste if over worked. I prefer tiny bits of shrimp in my lumpia instead of a shrimp cake.
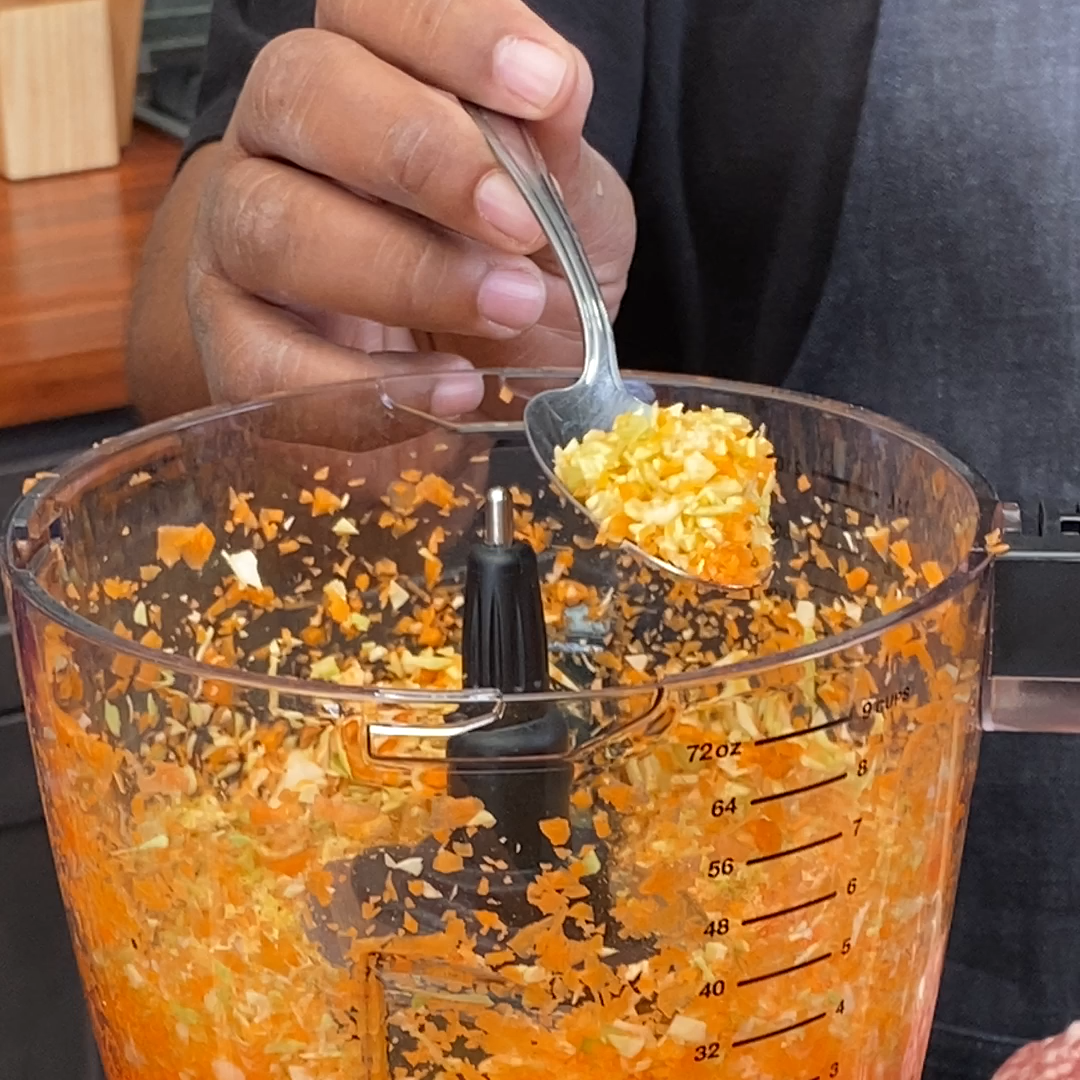
If you’re using a food processor, I recommend blitzing the carrots, onion, and garlic together first. Then adding the cabbage and finally the shrimp. I do roughly chop everything before adding to the food processor. I never toss in anything whole except for the garlic which I simply crush once.
Alright, enough text, lets get to the photos!
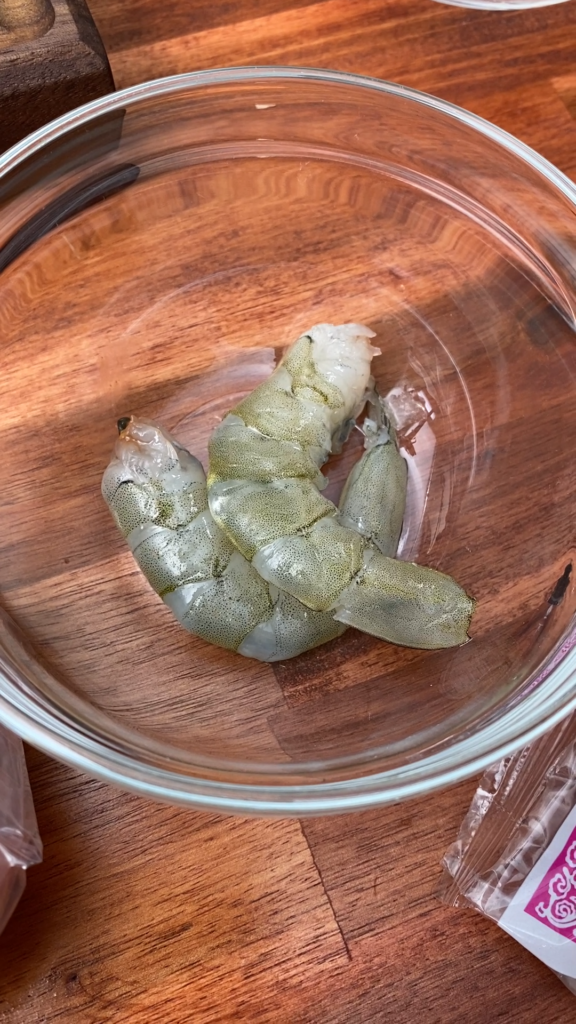
Start by roughly chopping shrimp
Blitz the veggies and aromatics first
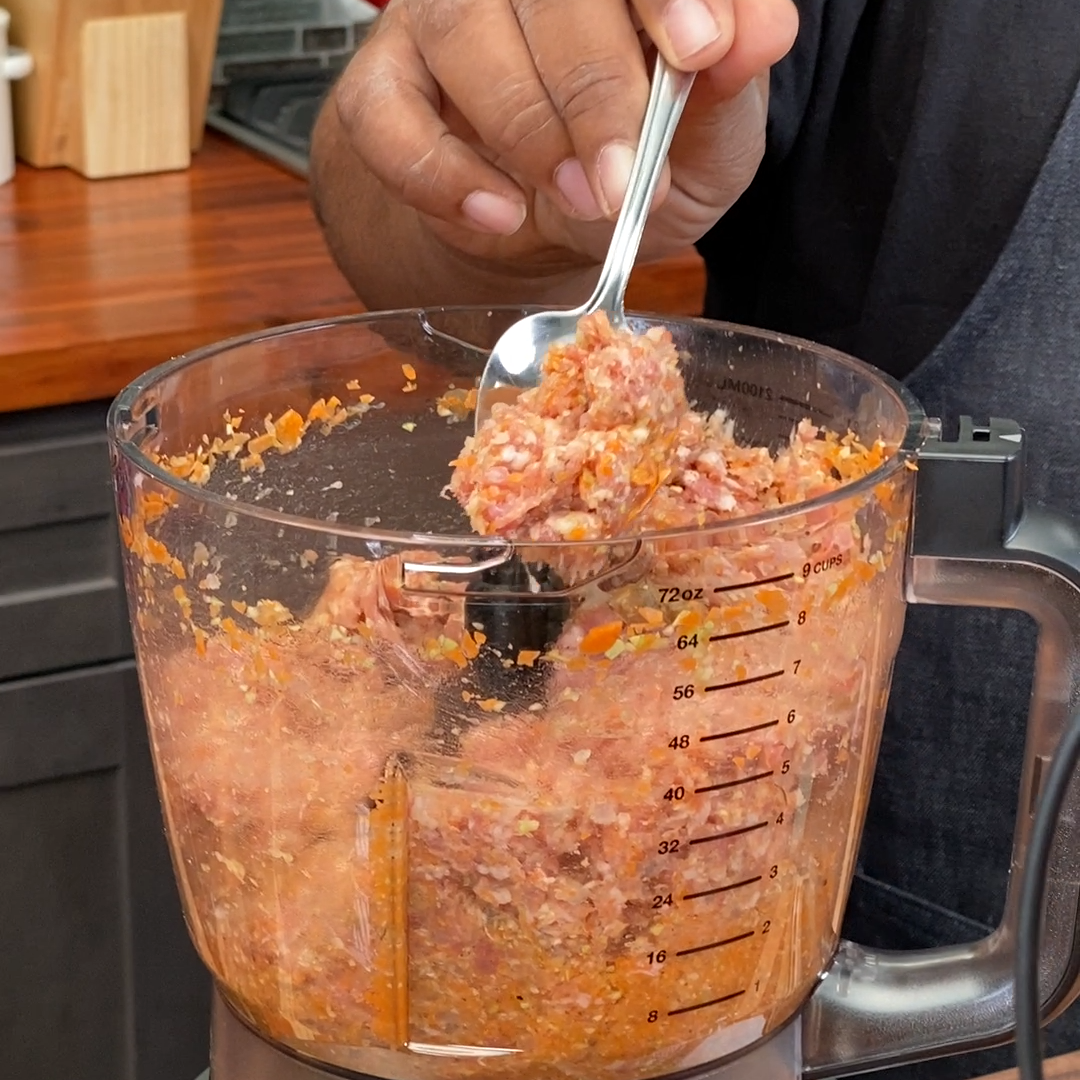
Add the shrimp and blitz. Adding the pork is optional since its already ground. I actually take the blitzed veggies plus shrimp and drop them into a separate bowl and adding the pork and flavorings there by hand (not pictured)
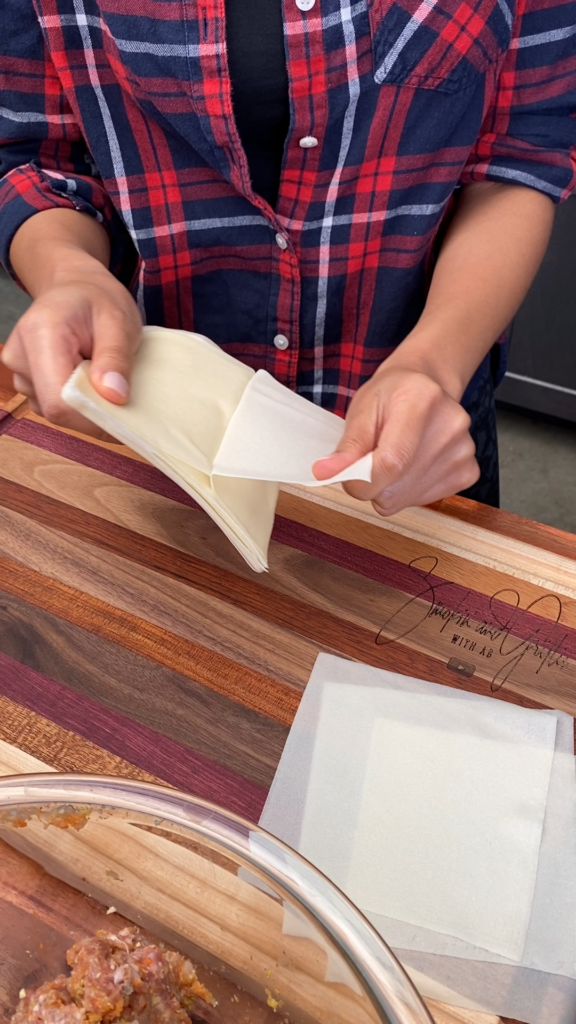
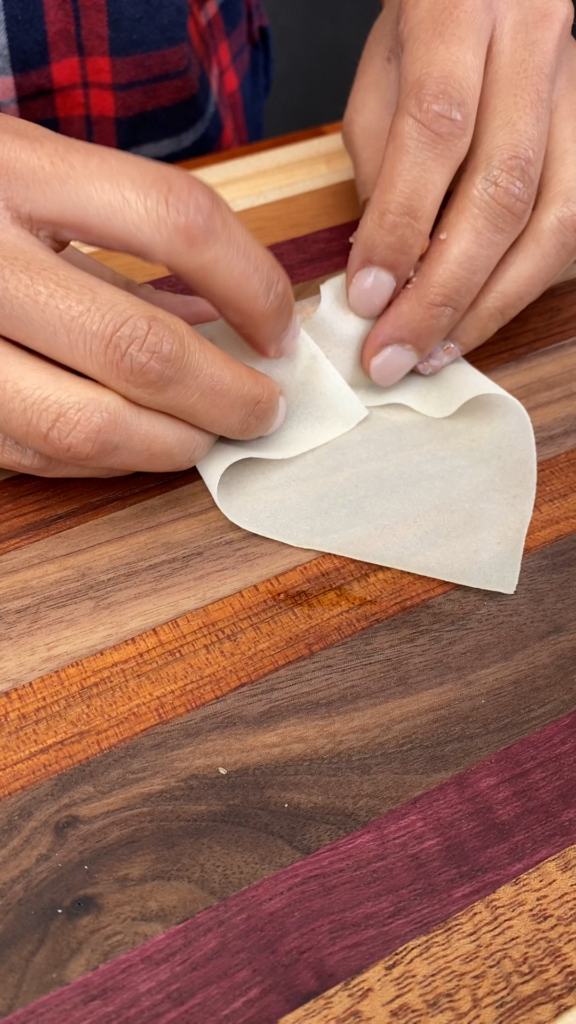
Wrap them all up! This part takes the longest but its a fun way to get helpers involved!
Put your wrapped lumpia in the freezer to harden. You can fry lumpia direct from frozen. Doing so will help the lumpia keeps its shape while frying.
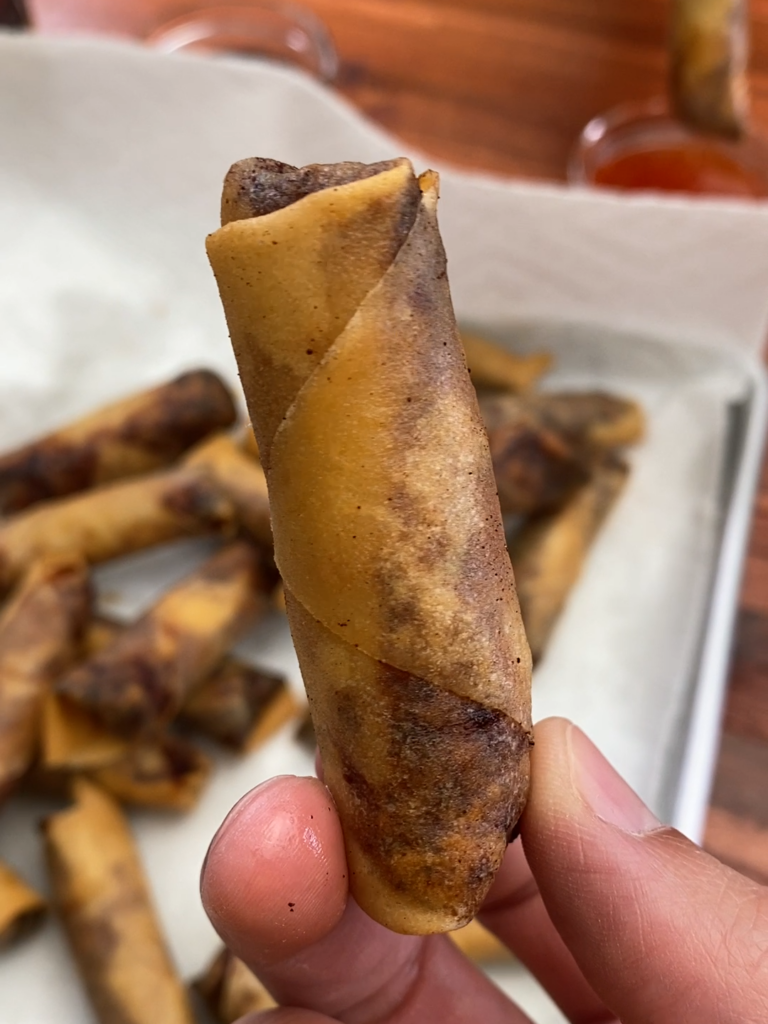
Deep fry and dig in but don’t forget to let it cool! Also get creative with the dips and sauces!
Recipe
Ingredients
Method
- Dice the shrimp. Peel if needed. Dicing the shrimp prevents the filling to become too stringy in the food processor
- Grab your food processor and throw in the garlic and onions. Blitz them up until they’re minced. Add the carrots and give it a few pulses. Add the cabbage (or whatever veggies you have). Do not over-process the ingredients into mush. You want to have some variety in the texture.
- Add the ground pork, diced shrimp, black pepper, salt, and fish sauce. Blend it all in the food processor. The fish sauce makes a HUGE difference; if you can, please try not to skip this ingredient. It’s very much worth it!
- Next, we will wrap this filling up! At this point you should begin separating the wrappers. If you have the Menlo brand, you can choose to cut them into quarters for smaller wrappers.
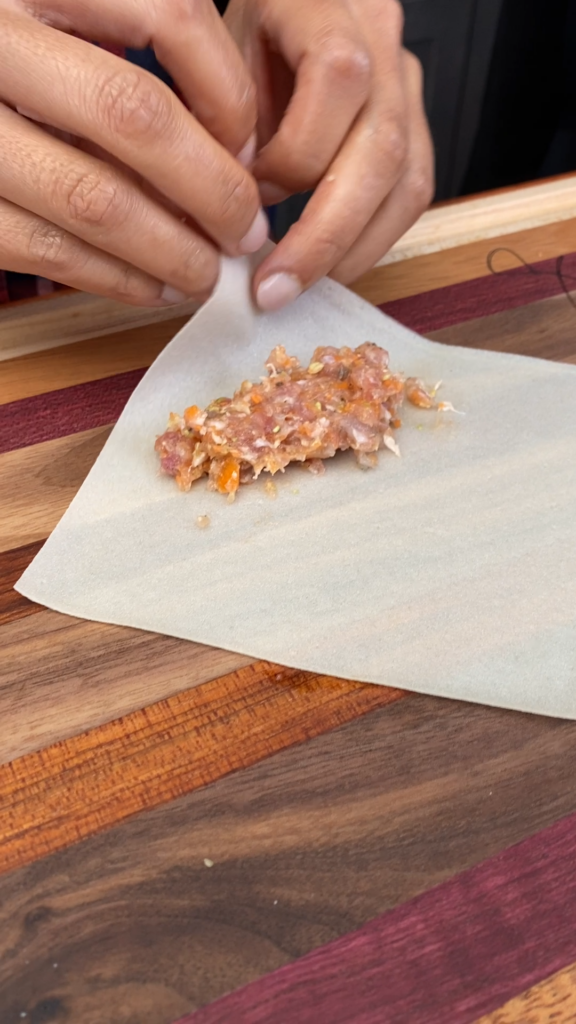
- Take 1 wrapper and place it on a flat surface, oriented to you as a diamond shape. Take ~2 tbsp of filling and lay it out in the shape of a log horizontally across the wrapper, leaving about 1½ inches from the side corners. Start with a conservative amount of filling. If you over stuff, the roll might open up during frying. Also, the thicker your roll, the longer you will have to fry
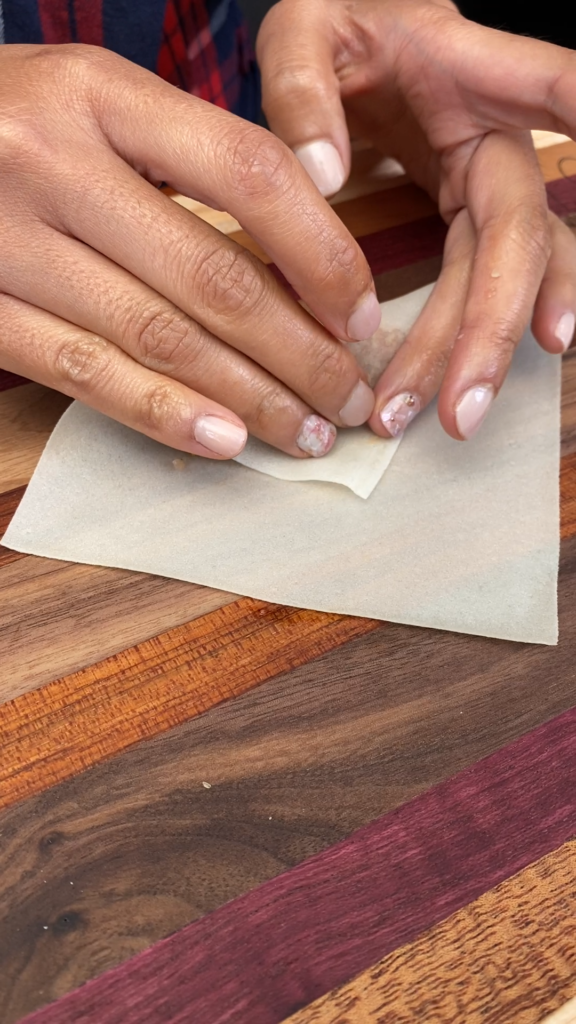
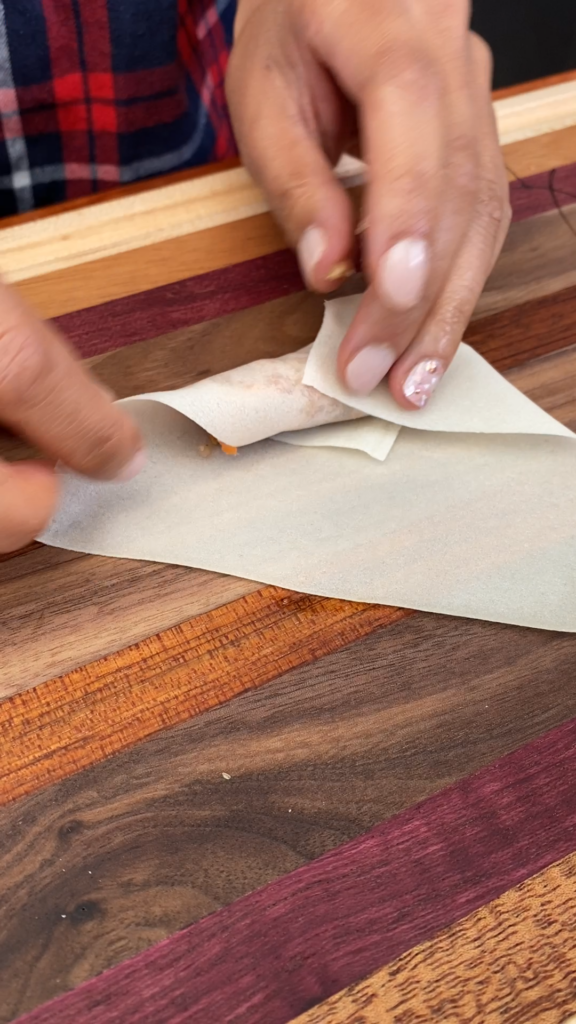
- Fold the bottom part of the wrapper over the filling, tucking it against the filling so that it’s tight and secure. Fold the 2 side corners toward the middle of the wrapped filling, and then continue rolling upwards until those newly folded corners are rolled up. **Keep the wrap tight.
- Dab your fingers in a small bowl of water and apply it to the edge of the wrap (usually the last, unrolled corner) to secure the wrap. The wet edge serves as a seal for the lumpia. Roll the rest of the way up, letting the wrapper stick to itself. Place on a plate with the sealed edge down to assist in keeping it sealed.
- Repeat steps 5→7 until you have used up all of your wrappers or filling.
- (OPTIONAL but recommended) Put your lumpia in the freezer to harden. You can fry lumpia direct from frozen. Doing so will help the lumpia keeps its shape while frying.
- Deep fry the lumpias at 350º – 375º F. If you don’t have a deep fryer, you can fill a saucepan with oil deep enough to submerge the lumpia. If you don’t have a thermometer, drop a small piece of wrapper into the oil. If it starts to bubble and float, the oil is ready for frying.
- Add only as much lumpia as will fit into the pan at a time. Fry for 4 minutes or until golden brown.
- Once the lumpia is ready, place them on a paper towel-lined bowl or plate to drain them of excess oil. Fry all the lumpia you wish
- Serve the lumpia hot and fresh with your choice of dipping sauce. Sweet chili sauce is the traditional choice.